10 minutes guide to install robust user to user chat for SaaS
Welcome to Maqpie. We've put together this quick guide to help you get started with configuring a user to user chat for your product in less than 10 minutes.
The integration process is trivial, not much harder than installing Google Analytics. There are very few steps:
- Sending basic user data, such as a full name, an email and a unique identifier.
- Setting up a contact list for users, so they can start talking to each other right away.
- Styling a chat to match your product colors scheme.
That's it! With these simple steps, you would have a beautiful, secure and full-featured chat within your application.
Our clients report that with a chat inside an application their users start spending less time with less efficient emails and other external messaging systems. For many of our clients, chat became a huge advantage over competitors. With our help, users keep your product opened for a longer time, learn and like it more. As a result, they become more loyal and less likely to churn.
Step 1: Send user data
If you are already using Live Chat, such as Intercom or Drift for customers support this step would be even simpler, because you should already have logged in user data on your layout. You just need to put a simple javascript code piece into your layout, the same way you would do for a Google Analytics:
<script>
  var MP = {
    data: {
      appId: "582c43845",
      user: {
        username: "Andrew Orsich",
        email: "andrew@maqpie.com",
        userId: "1"
      },
      userHash: ""
    }
  }
</script>
<script>(function(){var l=function(){var d=document;var s=d.createElement('script');s.type='text/javascript';s.async=true;s.src='https://widget.maqpie.com/widget/v1.0';var x=d.getElementsByTagName('script')[0];x.parentNode.insertBefore(s, x);};var w=window;if(w.attachEvent){w.attachEvent('onload', l)}else{w.addEventListener('load', l, false)}}())</script>
Done! Chat is already installed for your users, but we still need to setup a contact list, so users can talk to each other and be able to create group conversations.
Step 2: Setup a contact list
We made it really simple to automatically setup contact lists for your users. In most cases, you won't need to integrate with our API. All you need to do is just send us one more parameter, as a part of user data object - groupId.
What is groupId? GroupId is a simple string, which identifies a group of users allowed to talk to each other within your application. If you are integrating a chat into a SaaS product, in most cases you would have a company or an application as a part of your data. You can use their unique identifier as a groupId in that case.
Step 3: Customize chat
This is the step I love most. Within a few clicks, a chat will naturally fit in your product. You can adjust look right into your admin account:
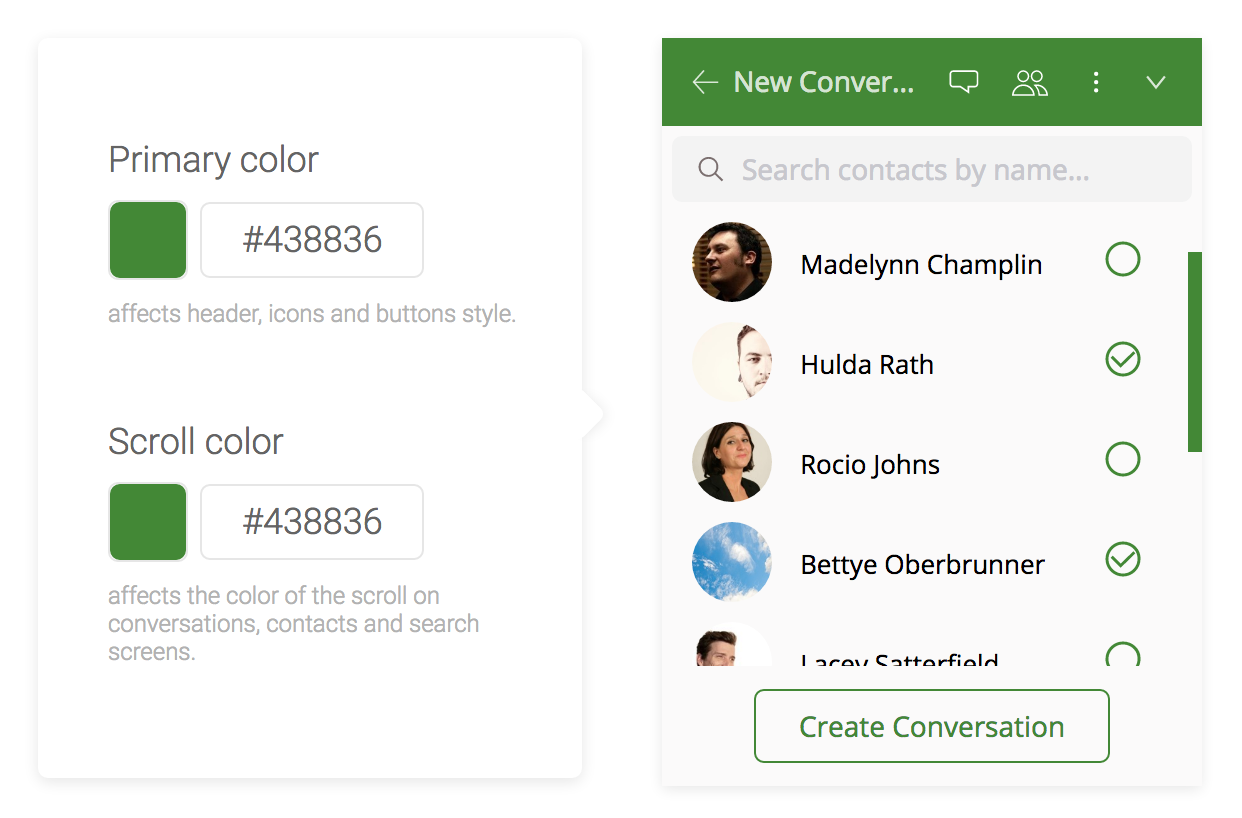
As we go, we will continue to improve chat look and feel. You don't need to invest the time of your team in any adjustments. Just change most important styles - and we will take care of the rest. We've been working closely with end users to ensure smooth user experience.
Email notifications
In many cases, it is quite important to fall back to email notifications. With email notifications in place, your users won't miss any important chat messages even if they are offline. You can upload your logo and set a company URL right in the admin panel:
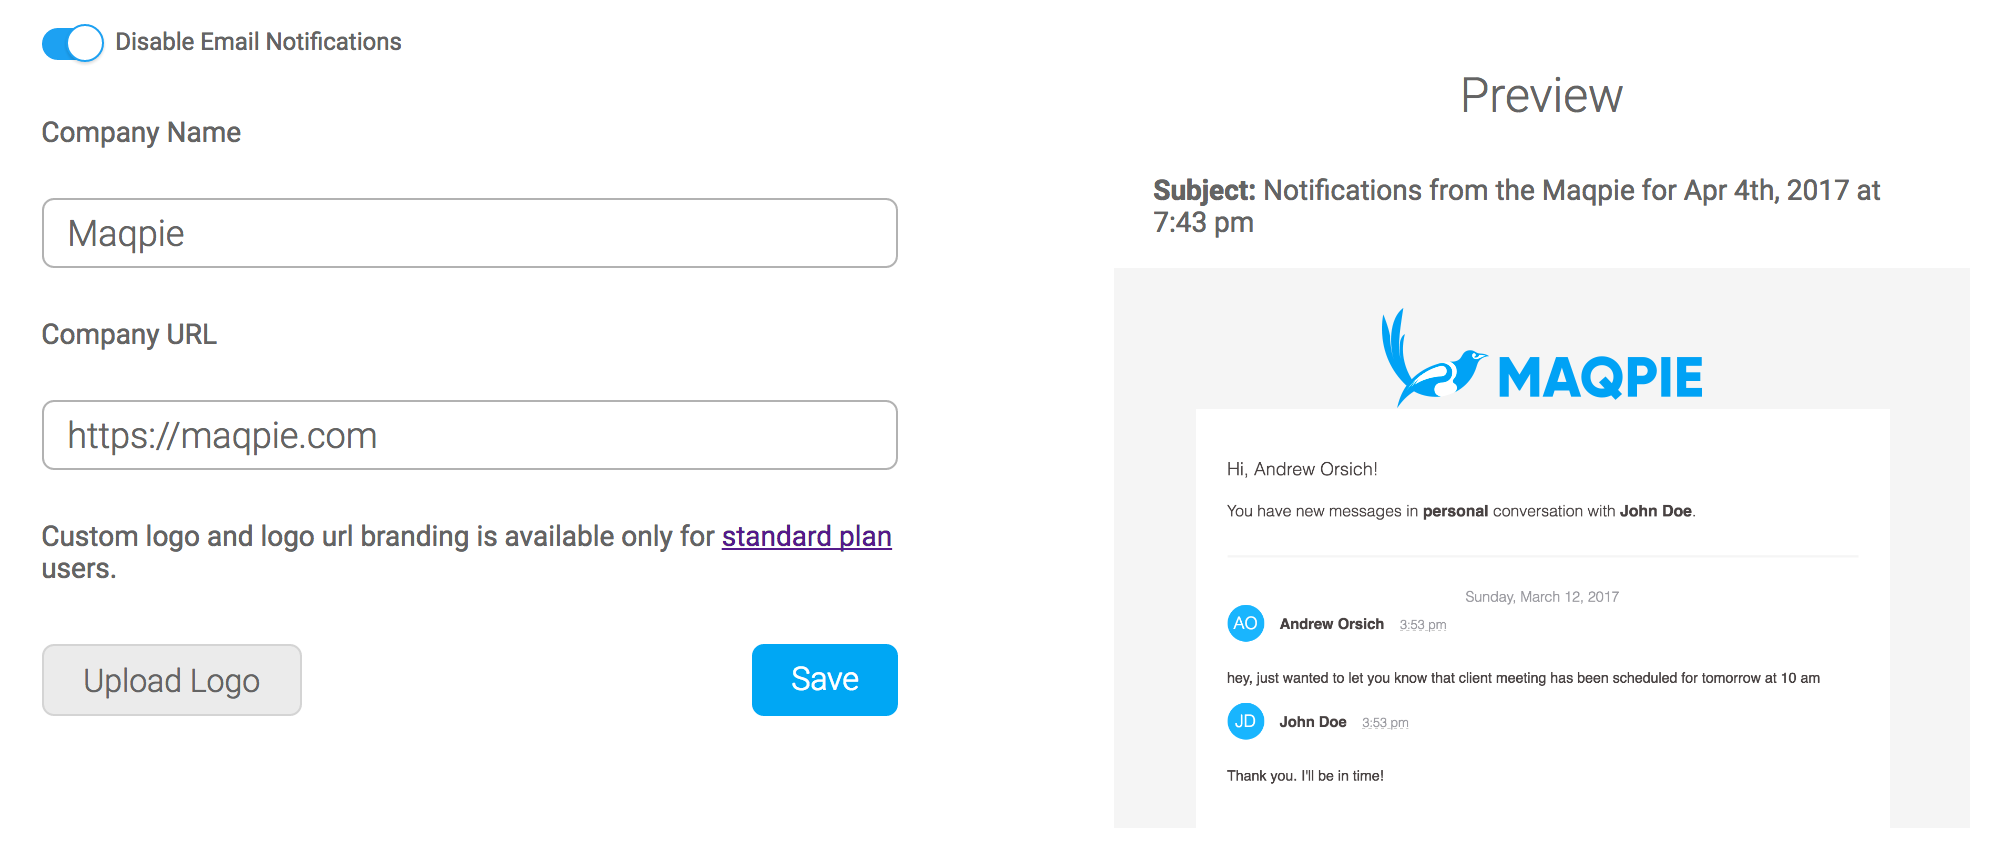
Once enabled on the admin panel, email notifications will start working for all your users immediately. Although, we know that not everyone likes getting too many emails. Specifically for this case, every user can turn them off right from their chat.
What’s next?
If you don't have an account yet - you can create it here. You can also check Maqpie in action.
Once you’re logged in to your Maqpie account, open the Setup Wizard to finish setting up.